Okta
!!! 注 "您正在使用吗? 请贡献!" 如果您正在使用此 IdP,请考虑[贡献](.../.../developer-guide/site.md)到此文档。
通过至少两种方法,使用 Okta 实现了正常工作的单点登录配置:
SAML(使用 Dex)
注意 "Okta 应用程序组分配",Okta 应用程序的组属性声明 regex 稍后将被引用来将 Okta 组映射到 Argo CD RBAC 角色。
1.在 Okta UI 中创建一个新的 SAML 应用程序。
- 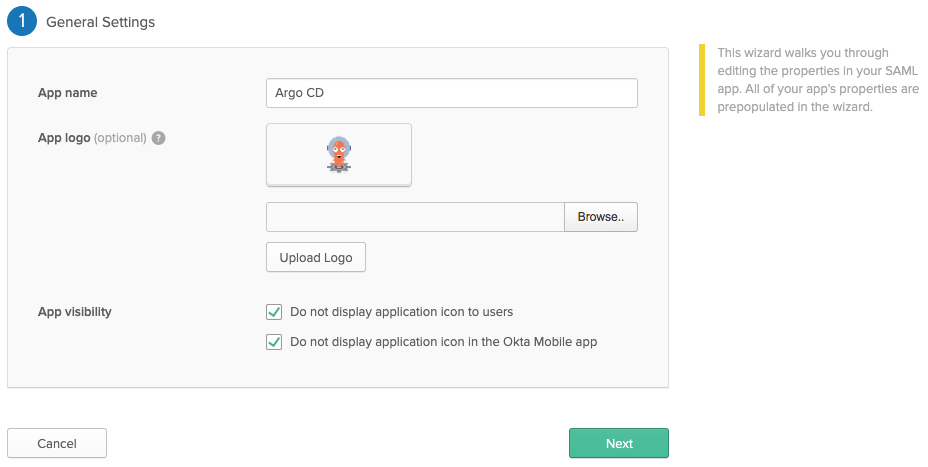 我禁用了 "应用程序可见性",因为 Dex 不支持由 Provider 发起的登录流。
- Okta SAML 应用程序 2](../../assets/saml-2.png)
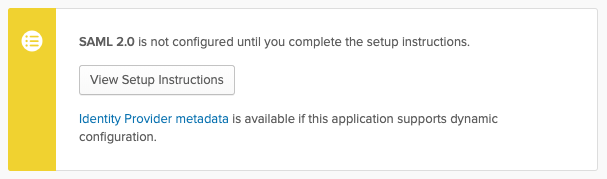
2.在 Okta 中创建应用程序后,点击 "查看设置说明"。
-
我禁用了 "应用程序可见性",因为 Dex 不支持由 Provider 发起的登录流。
- Okta SAML 应用程序 2](../../assets/saml-2.png)
2.在 Okta 中创建应用程序后,点击 "查看设置说明"。
-  3.将 Argo CD URL 复制到 data.url 中的
argocd-cm。
data:
  url: https://argocd.example.com
1.下载 CA 证书,以便在 argocd-cm 配置中使用。
- 如果在 caData 字段中使用,则需要通过 base64 编码引用整个证书(包括 -----BEGIN CERTIFICATE----- 和 -----END CERTIFICATE----- 句),例如 base64 my_cert.pem。
- 如果您使用 ca 字段并将 CA 证书作为 secret 单独存储,则需要将 secret 挂载到 argocd-dex-server 部署中的 dex 容器。
- 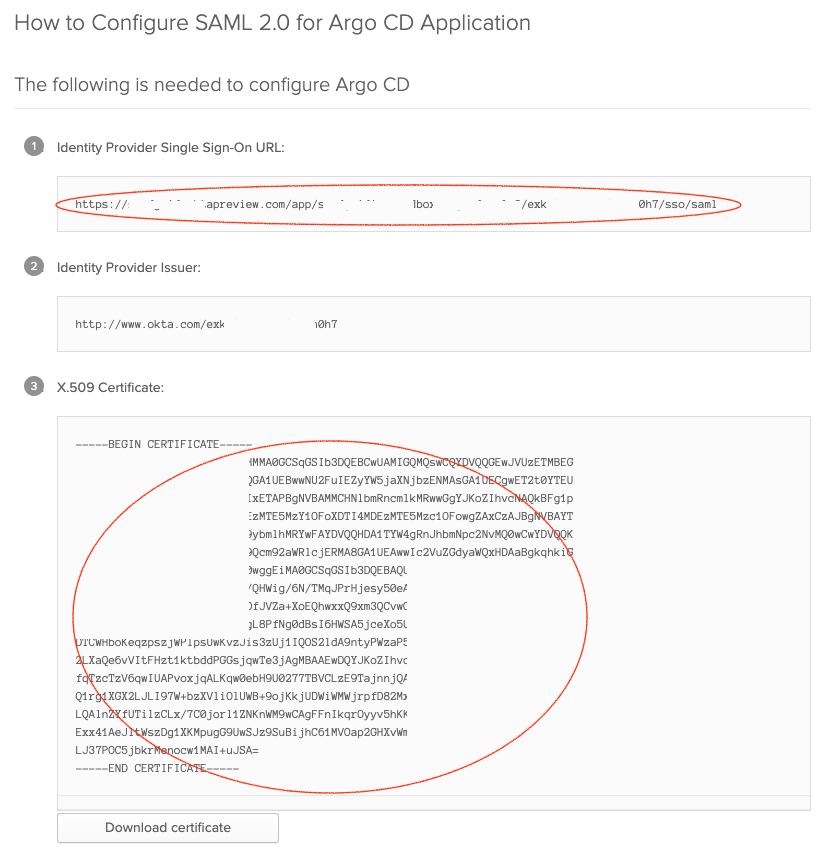 2.编辑
2.编辑 argocd-cm 并配置 data.dex.config 部分:
dex.config: |
  logger:
    level: debug
    format: json
  connectors:
  - type: saml
    id: okta
    name: Okta
    config:
      ssoURL: https://yourorganization.oktapreview.com/app/yourorganizationsandbox_appnamesaml_2/rghdr9s6hg98s9dse/sso/saml
      # You need `caData` _OR_ `ca`, but not both.
      caData: |
        <CA cert passed through base64 encoding>
      # You need `caData` _OR_ `ca`, but not both.
      # Path to mount the secret to the dex container
      ca: /path/to/ca.pem
      redirectURI: https://ui.argocd.yourorganization.net/api/dex/callback
      usernameAttr: email
      emailAttr: email
      groupsAttr: group
私人部署
可以使用私人 Argo CD 安装设置 Okta SSO,其中 Okta 回调 URL 是唯一公开暴露的端点。 设置大致相同,只需在 Okta 应用程序配置和 argocd-cm ConfigMap 的 data.dex.config 部分做一些更改即可。
使用这种部署模式,用户连接到私有 Argo CD UI,Okta 身份验证流程会无缝重定向回私有 UI URL。
通常情况下,这个公共端点是通过[ingress 对象](.../../ingress/#private-argo-cd-ui with-multiple-ingress-objects and-byo-certificate)公开的。
1.更新 Okta 应用程序常规设置中的 URL
- 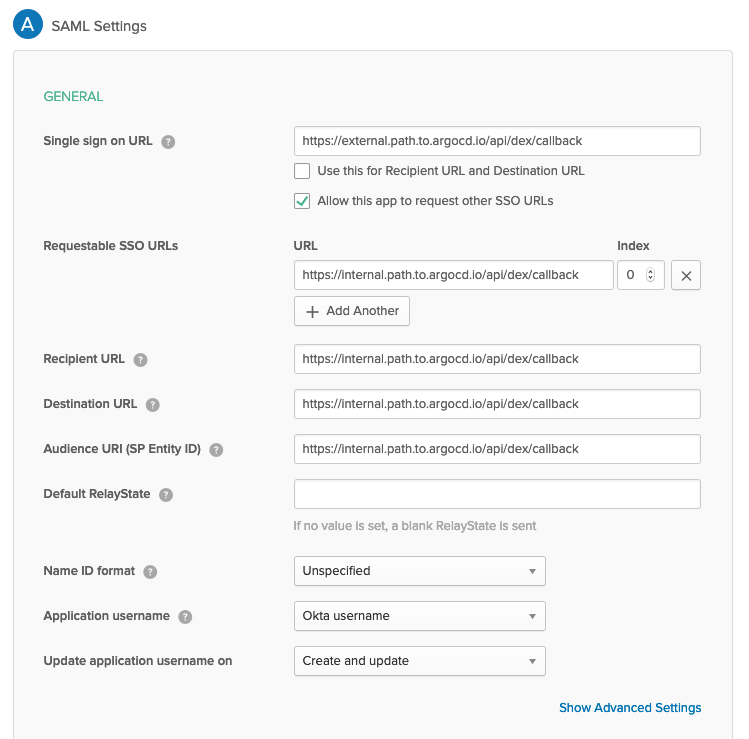 单点登录 URL" 字段指向公开暴露的端点,所有其他 URL 字段指向内部端点。
2.用外部端点引用更新
单点登录 URL" 字段指向公开暴露的端点,所有其他 URL 字段指向内部端点。
2.用外部端点引用更新 argocd-cm configMap 的 data.dex.config 部分。
dex.config: |
  logger:
    level: debug
  connectors:
  - type: saml
    id: okta
    name: Okta
    config:
      ssoURL: https://yourorganization.oktapreview.com/app/yourorganizationsandbox_appnamesaml_2/rghdr9s6hg98s9dse/sso/saml
      # You need `caData` _OR_ `ca`, but not both.
      caData: |
        <CA cert passed through base64 encoding>
      # You need `caData` _OR_ `ca`, but not both.
      # Path to mount the secret to the dex container
      ca: /path/to/ca.pem
      redirectURI: https://external.path.to.argocd.io/api/dex/callback
      usernameAttr: email
      emailAttr: email
      groupsAttr: group
将 Okta 组连接到 Argo CD 角色
Argo CD 可以感知符合 Group Attribute Statements regex 的 Okta 组的用户成员身份。 上例引用了 argocd-* regex,因此 Argo CD 可以感知名为 argocd-admins 的组。
修改 argocd-rbac-cm ConfigMap,将 argocd-admins Okta 组连接到 Argo CD 内置的 admin 角色。
apiVersion: v1
kind: ConfigMap
metadata:
  name: argocd-rbac-cm
data:
  policy.csv: |
    g, argocd-admins, role:admin
  scopes: '[email,groups]'
OIDC(不含 Dex)
!!! 警告 "您是否希望稍后为 RBAC 设置群组?"如果您希望从 Okta 返回 "群组 "范围,您需要联系支持人员启用 API Access Management with Okta 或 just use SAML above! 。
Next you may need the API Access Management feature, which the support team can enable for your OktaPreview domain for testing, to enable "custom scopes" and a separate endpoint to use instead of the "public" `/oauth2/v1/authorize` API Access Management endpoint. This might be a paid feature if you want OIDC unfortunately. The free alternative I found was SAML.
1.在 "Okta 管理 "页面上,导航到 "安全 > API "中的 "Okta API 管理"。 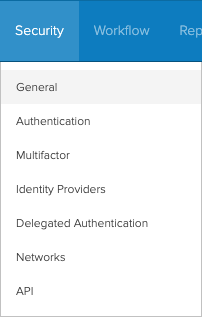 2.选择您的 "默认 "授权服务器。
3.单击
2.选择您的 "默认 "授权服务器。
3.单击 范围 > 添加范围
1.添加名为groups的范围。

4.单击索赔 > 添加索赔。
1.添加名为 groups 的索赔
2.选择所需的匹配选项,例如
+ 例如,要匹配以 argocd- 开头的组,您可以使用第 3 步中的作用域名称(例如 groups)返回一个 ID 标记,其中组名 匹配regexargocd-.*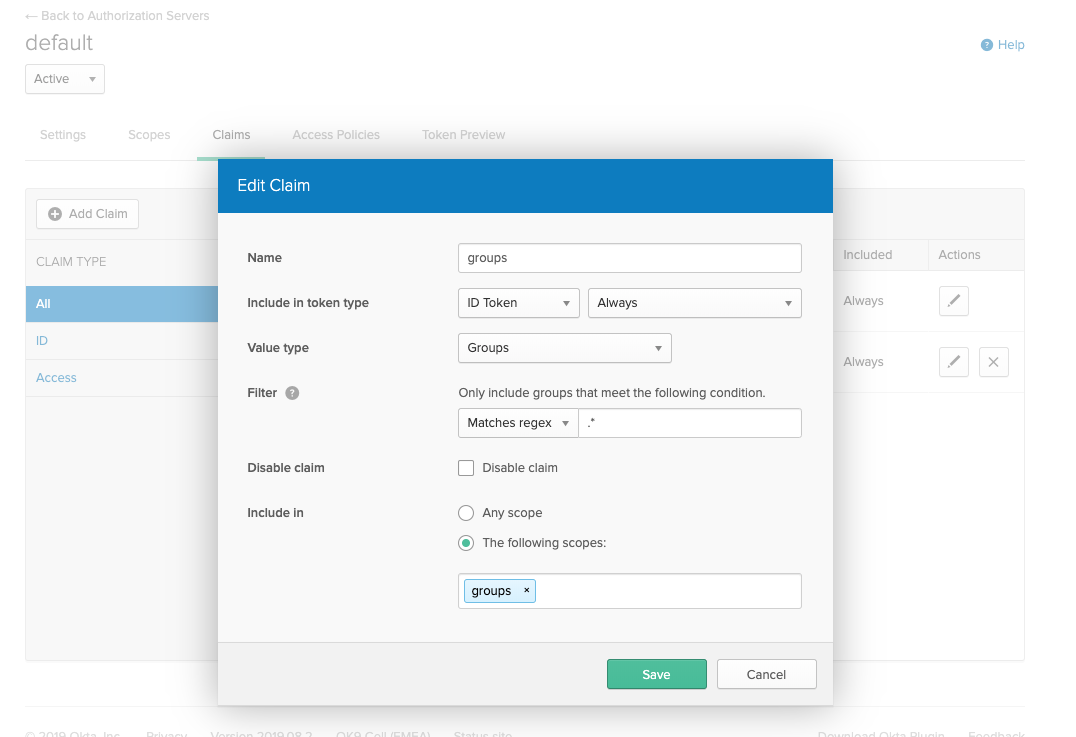
5.编辑argocd-cm并配置data.oidc.config` 部分:
oidc.config: |
  name: Okta
  issuer: https://yourorganization.oktapreview.com
  clientID: 0oaltaqg3oAIf2NOa0h3
  clientSecret: ZXF_CfUc-rtwNfzFecGquzdeJ_MxM4sGc8pDT2Tg6t
  requestedScopes: ["openid", "profile", "email", "groups"]
  requestedIDTokenClaims: {"groups": {"essential": true}}